
What Is Continuous Integration?
Related guide: DORA metrics and AI coding
Continuous Integration, or CI, is a practice where developers merge their code changes into a central repository several times a day. Once they do, a set of automated builds and tests kick off immediately. The whole point is to catch bugs faster, boost software quality, and dramatically shorten the time it takes to get new updates out the door.
Think of it as an automated quality-control checkpoint that runs every single time a developer adds something new to the project.
Understanding Continuous Integration Without the Jargon

Let’s imagine a team building a giant LEGO castle. The old way of doing things would be for each person to build their own separate tower or wall for weeks on end. When it was finally time to put it all together, nothing would fit. Towers would be the wrong height, walls wouldn’t connect, and the whole structure would be unstable. This nightmare scenario is what developers call “integration hell.”
Continuous Integration is the smart, modern answer to this problem. Instead of one huge, terrifying integration day, developers add just a few LEGO bricks to the main castle, multiple times a day. And here’s the magic part: every time someone adds a piece, an automated system instantly checks to make sure it fits perfectly and doesn’t weaken the rest of the castle.
This constant cycle of merging and checking means the main project—what we call the “master” branch—is always stable and ready to go. It turns integration from a dreaded, high-stakes event into a simple, everyday habit.
To really see the difference, let’s compare the old way with the new.
Manual Integration vs Continuous Integration At a Glance
The table below breaks down just how much CI changes the game, shifting teams from a high-risk, high-stress process to a smooth, predictable workflow.
| Aspect | Manual Integration (The Old Way) | Continuous Integration (The Modern Way) |
|---|---|---|
| Frequency | Infrequent (weeks or months apart) | Frequent (multiple times per day) |
| Risk | High. Large changes often break things. | Low. Small changes are easy to fix. |
| Bug Discovery | Late. Bugs found long after being introduced. | Immediate. Bugs found within minutes. |
| Developer Effort | High. Requires days of manual merging and fixing. | Low. Automated process runs in the background. |
| Team Confidence | Low. Fear of “breaking the build.” | High. Confidence that the main code always works. |
As you can see, it’s not just a minor improvement; it’s a fundamental shift in how teams build software, making the entire process more reliable and less stressful.
The Core Idea Behind CI
This concept has been around for a while. It was first described by Grady Booch in 1991 as a way to get around the bottlenecks that crippled big software projects. His idea was to use small, frequent internal releases to keep the system constantly integrated, valuing steady progress over massive, disruptive updates. You can explore more about these early concepts and see how they paved the way for modern development.
Ultimately, the goals for setting up a CI system are pretty simple:
- Automate Everything: The build, the tests, and the validation process should all happen automatically, triggered the moment a developer commits their code. This gets rid of manual work and the human errors that come with it.
- Fail Fast, Fix Fast: Bugs are caught within minutes of being created, not weeks later when a QA team finally gets to them. This makes them way easier and cheaper to fix.
- Maintain a Stable Mainline: The central codebase is always in a working state. This gives you a solid, reliable foundation to build new features or ship a release at any time.
By adopting this approach, teams can finally say goodbye to the anxiety of “merge day” and instead enjoy the confidence that comes from a constantly validated, always-working project.
How a CI Pipeline Turns Code Into Confidence
So, what does continuous integration actually look like day-to-day? Let’s follow a single code change to see it in action.
Imagine a developer adds a new button to your web app. The second they push that small update to a shared code repository like GitHub, they kick off an automated process—a virtual assembly line—built to protect the project from breaking.
That initial push is the starting gun. A CI server, which acts as the project’s tireless guardian, immediately spots the new code. It doesn’t wait for a manual command or for someone to remember to run it; the whole thing is automatic. This is the first step in turning a few lines of code into a validated, reliable part of your application.
This infographic gives you a high-level look at the flow, showing how code travels from a developer’s computer through a series of automated quality checks.
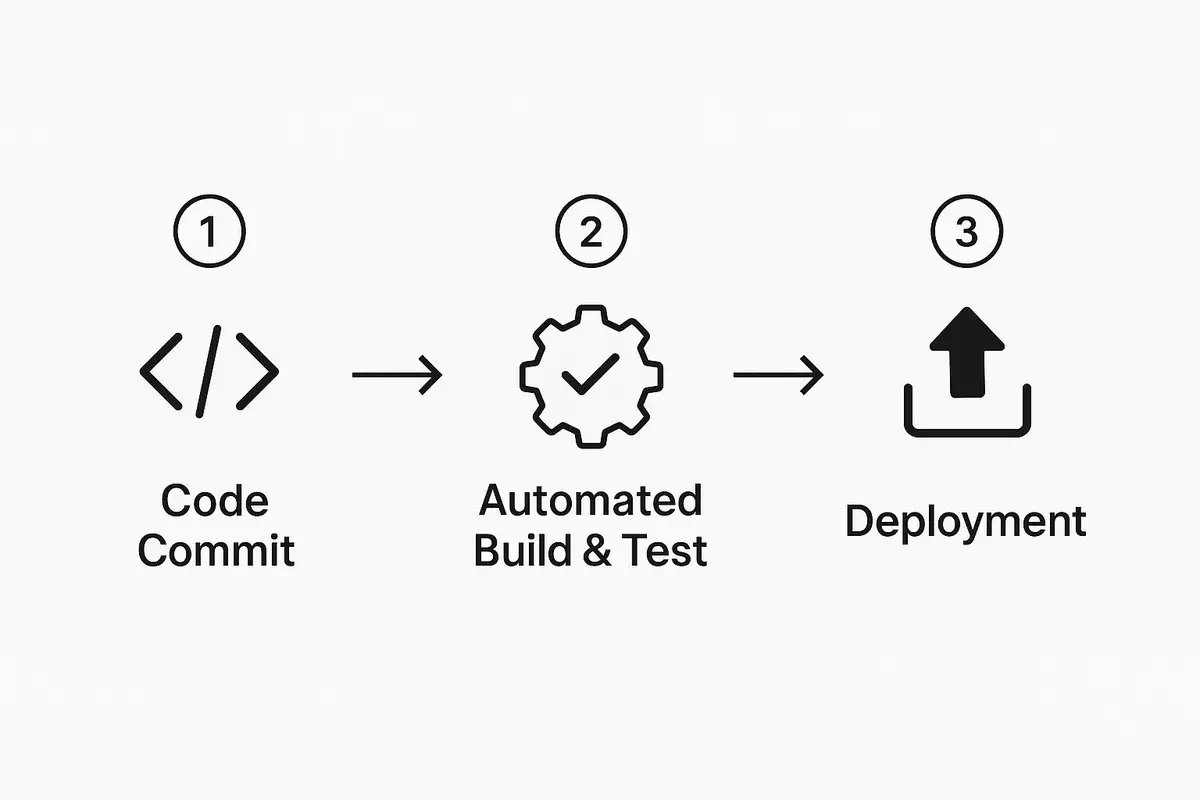
As you can see, the core of CI is a tight loop: code, build, test, and prepare for deployment. It’s all about creating a rapid feedback cycle for your team.
The Automated Build Stage
Once the CI server grabs the new code, it kicks off the build phase. Think of this like a chef gathering all the ingredients and following a recipe to prepare a dish. The server creates a fresh, clean environment to make sure the build isn’t tainted by any old files or configurations.
This stage involves a few key automated steps:
- Checkout Code: The server pulls the latest version of the code from the repository, including our developer’s new button.
- Install Dependencies: Next, it installs all the libraries, frameworks, and other tools the application needs to run. It’s like gathering all your LEGO bricks before you start building. For a web app, this might mean fetching packages with a tool like npm or pnpm.
- Compile and Package: Finally, the server compiles the source code into a runnable application. The result is a single, self-contained package called a “build artifact,” which is now ready for testing.
The Crucial Testing Phase
With the application built, the pipeline moves on to the most important part of CI: automated testing. This is where you really start building confidence in your code. The CI server runs a pre-written suite of tests against the new build, hunting for any bugs or regressions the new code might have caused.
A fast, reliable test suite is the heart of any good CI pipeline. The goal is to give feedback to the developer in minutes, not hours. If a build takes too long to run, developers get distracted and lose the context they had when they wrote the code.
These tests typically come in a few flavors:
- Unit Tests: These check small, individual pieces of code, like a single function, in isolation.
- Integration Tests: These make sure different parts of the application work together as expected.
- End-to-End Tests: These simulate real user behavior to confirm that entire workflows are functioning correctly.
If every single test passes, the build is marked as “green” or successful. The change is considered safe and can be merged into the main codebase. But if even one test fails, the build is “broken.” The developer gets an instant notification, allowing them to fix the problem while the solution is still fresh in their mind. This simple loop prevents bugs from ever making it to the rest of the team or, worse, to your users.
Why Your Team Needs Continuous Integration
It’s one thing to understand the mechanics of a CI pipeline, but it’s another thing entirely to see the impact it has in the real world. This is what gets teams on board. Adopting continuous integration isn’t just about tweaking your tech stack; it’s a fundamental shift that solves some of the most frustrating problems in software development. It changes a team’s workflow from a series of stressful, high-stakes events into a predictable and productive rhythm.
The real magic of CI is that it makes integration a complete non-event. Gone are the dreaded “merge days” that devolve into a nightmare of conflicts and broken code. Instead, merging becomes a routine, automated process that just hums along in the background. This one change creates a domino effect of benefits that every high-performing team depends on.
Reduce Integration Risks
We’ve all been there. Developers work in their own bubbles for days, or even weeks. When it’s finally time to bring all that work together, you get “merge hell”—a frantic scramble to fix conflicting code and track down bugs that have been hiding for who knows how long. Good luck finding the root cause.
Continuous integration completely flips that scenario on its head. When you integrate small changes multiple times a day, any conflicts are tiny and easy to sort out. If a bug slips in, the automated tests catch it almost immediately.
The system pinpoints the exact commit that broke the build. The developer can then fix it in minutes, not days. Integration stops being a source of risk and becomes a source of stability.
Accelerate Development Cycles
One of the biggest drags on productivity is waiting. Waiting for builds to finish, for tests to run, or for someone to review a pull request—it all adds up and slows the whole team down. A solid CI pipeline automates this feedback loop, running everything in the background and giving developers answers in minutes.
Take the team at Datawrapper, for instance. They realized their CI runs were taking 17 minutes each and were being triggered 50-100 times per day. By optimizing their pipeline, they cut their CI wait times by a staggering 80%. That’s a huge amount of time they got back, which they could spend on the next task instead of just watching a progress bar.
Elevate Code Quality and Productivity
When every single change is automatically tested, the quality of your code can’t help but improve. Bugs are squashed long before they make it into the main codebase, so they never affect other developers or, even worse, your customers. This automated safety net gives developers the confidence to refactor and experiment without the fear of breaking everything.
CI also frees up your team from the mind-numbing manual work of merging and testing. This lets them focus on what they were hired to do: write great code and solve interesting problems. By automating the boring stuff, you’re empowering your team to be more creative and get more done.
Building Your Continuous Integration Toolchain
To actually make continuous integration happen, you need a set of tools that can talk to each other and work in harmony. This collection of software is what we call a CI toolchain. Each piece has a specific job to do, automating the entire journey from a developer’s code commit all the way to a validated build.
The CI server is the conductor of this whole orchestra. It constantly watches your code repository, and the second it sees a new change, it kicks off the entire automated workflow. Popular servers like Jenkins, GitLab CI, and GitHub Actions are responsible for coordinating everything—building the code, running all the tests, and then reporting the results back to the team. This is the central hub where you define and manage your CI process.
It’s no secret that these tools are becoming standard practice. A recent analysis of over 600,000 developer repositories revealed that 32.7% are now using CI/CD technologies. What’s more, the landscape is shifting fast. The rate of teams switching their CI/CD tools jumped from 2.3% in 2013 to 12.6% in 2021, a change driven heavily by the growing popularity of platforms like GitHub Actions. You can read the full research on CI adoption trends to dive deeper into how the ecosystem is evolving.
Core Components of a CI Setup
A solid CI toolchain is much more than just the server; it’s a whole ecosystem of interconnected parts.
-
Version Control System (VCS) This is where it all begins. A VCS like Git is the single source of truth where all your team’s code is stored. The CI server keeps an eye on this repository, and every new commit acts as a trigger to start the pipeline. Simply put, without a central VCS, you can’t have the “integration” in continuous integration.
-
Build Tools After the CI server grabs the latest code, it needs a build tool to compile it into something usable. For a Java project, you’d likely use Maven or Gradle. For a modern web app, you might use Webpack or Vite. These tools are what turn raw source code into an actual, runnable piece of software.
-
Testing Frameworks This is your automated quality gate. Testing frameworks run your test suites to make sure the new code doesn’t break anything. Depending on your tech stack, you might be using Jest for JavaScript, Pytest for Python, or JUnit for Java. These frameworks are what ultimately give a build the “green light” to proceed or the “red light” to stop.
When you put these pieces together, you get an automated assembly line for your code. A developer pushes a change to Git, the CI server notices it, a build tool compiles the application, and a testing framework verifies it works. This tight feedback loop is the heart of modern, efficient software development.
Your First CI Pipeline with GitHub Actions

Okay, enough with the theory. The best way to really understand something is to get your hands dirty. So, let’s build your very first CI pipeline. We’ll be using GitHub Actions, a fantastic and accessible tool that’s baked right into GitHub, making it a natural starting point.
To keep things simple, we’ll set up a workflow for a basic Node.js project. The whole process boils down to creating a special folder and a configuration file in your repository. Once that’s in place, GitHub will automatically find it and run your pipeline every time you push new code.
Creating Your Workflow File
The brains behind GitHub Actions is the workflow file. It’s written in a simple format called YAML and tells GitHub when to run your pipeline and what to do.
First, you’ll need to create a specific folder path in your project: .github/workflows/. Inside that workflows folder, you can create a file—we’ll call ours ci.yml. This is where all the magic happens and where you’ll define every step of your automated process.
Think of a workflow file as a recipe. It lists your ingredients (code and tools), gives step-by-step instructions (build and test commands), and tells you when to start cooking (like when you push new code).
As soon as you commit this file, GitHub takes over. You don’t need to set up any servers; the entire pipeline runs on virtual machines that GitHub provides, which they call “runners.” This makes getting started with CI incredibly straightforward for any project you have on the platform.
A Complete CI Pipeline Example
Here is a complete, commented ci.yml file for a simple Node.js application. You can literally copy and paste this into your own .github/workflows/ci.yml file. It’s set up to install dependencies, lint your code, and run your tests automatically.
# Name of the workflow displayed on GitHub
name: Node.js CI

# Defines the trigger for this workflow
on:
  push:
    branches: [ "main" ] # Runs on pushes to the main branch
  pull_request:
    branches: [ "main" ] # Runs on pull requests targeting the main branch

# A workflow run is made up of one or more jobs that run in parallel
jobs:
  # The "build" job is the main job in this workflow
  build:
    # The type of runner that the job will run on
    runs-on: ubuntu-latest

    # A strategy for running the job with different Node.js versions
    strategy:
      matrix:
        node-version: [18.x, 20.x]

    # Steps represent a sequence of tasks that will be executed
    steps:
      # Step 1: Checks out your repository's code
      - name: Checkout code
        uses: actions/checkout@v4

      # Step 2: Sets up the specified Node.js version
      - name: Use Node.js ${{ matrix.node-version }}
        uses: actions/setup-node@v4
        with:
          node-version: ${{ matrix.node-version }}
          cache: 'npm' # Caches npm dependencies for faster runs

      # Step 3: Installs project dependencies
      - name: Install dependencies
        run: npm ci

      # Step 4: Runs the linting script to check code style
      - name: Run linter
        run: npm run lint

      # Step 5: Runs the automated tests
      - name: Run tests
        run: npm test
So, what’s actually happening here?
The on section defines the triggers. This workflow will kick off whenever someone pushes code to the main branch or opens a pull request for it.
The jobs section lays out the work to be done. We have one job here called build, and it runs on a standard ubuntu-latest virtual machine.
The strategy matrix is a neat feature that lets us run the same job across different environments. Here, it will run our entire test suite twice—once with Node.js version 18.x and again with 20.x.
Finally, the steps are the individual commands. The pipeline checks out your code, installs your project dependencies with the faster npm ci command, and then runs your linter and tests. Just like that, this simple file turns the abstract idea of continuous integration into a real, working pipeline for your project.
Getting CI Best Practices Right
Setting up a CI pipeline is just the first step. The real magic happens when you turn that pipeline into a powerful engine for your development team. Adopting a few key habits can transform a basic workflow into a high-performance system that consistently delivers value. These are the principles that separate truly effective CI from a pipeline that’s just going through the motions.
The absolute foundation of great CI is committing small, frequent changes. Instead of pushing massive features once a week, developers should be integrating their work multiple times a day. This simple habit dramatically cuts down on gnarly merge conflicts and makes it incredibly easy to pinpoint the exact source of a problem when a build breaks. Small commits are the lifeblood of a healthy pipeline.
Keep Your Builds Fast
Nothing kills productivity like a slow pipeline. If developers have to wait 20 minutes for feedback, they’ll inevitably switch tasks, lose focus, and the context is gone. The goal is to provide feedback so quickly that they can fix issues while the code is still fresh in their minds. This is where the famous “ten-minute build” rule comes in.
A build should be fast enough that it doesn’t interrupt a developer’s flow. Aim to have your entire CI process—from commit to test results—complete in under ten minutes.
This isn’t a new idea; its roots go way back to the origins of CI. The practice popped up in the 1990s as a way to manage the risks of developers working in isolation for too long. The Extreme Programming community really popularized this approach, with pioneers like Kent Beck championing rapid testing cycles to keep development moving at a good clip. You can read more about the history of the ten-minute build rule and its lasting impact.
Treat a Broken Build as an Emergency
When a build on the main branch breaks, it should be treated like a critical bug. It stops all other integration dead in its tracks, blocking the entire team until it’s fixed. The best teams have a “stop the line” mentality—just like on a factory assembly line—where everyone’s top priority is to get the build passing again.
To keep your CI culture healthy, make sure everyone follows these ground rules:
- Commit Often: Push small, logical chunks of code to the repository multiple times a day.
- Maintain the Test Suite: Your automated tests need to be fast, reliable, and provide meaningful coverage.
- Fix Broken Builds Immediately: Never, ever commit new code on top of a broken build. Make fixing it the team’s number one priority.
- Never Go Home on a Broken Build: This cultural rule is a powerful one. It ensures the main branch is always stable and ready for the next day’s work.
Got Questions About Continuous Integration?
Now that we’ve walked through the basics of continuous integration, let’s tackle some of the questions that pop up all the time. This is where we clear up common points of confusion and offer some practical advice for getting started.
What’s the Difference Between Continuous Integration and Continuous Delivery?
It’s easy to mix these two up, but they handle different parts of the development pipeline.
Continuous Integration (CI) is all about frequently merging code changes into a central repository. Every time a developer pushes a change, an automated process kicks off to build the software and run tests. The whole point is to catch bugs quickly and make sure the main codebase is always healthy.
Continuous Delivery (CD) is the logical next step. It takes the code that passed all the CI checks and automatically prepares it for a release to production.
Think of it like this: CI is like having a master chef taste-test every single ingredient before adding it to the pot. CD is having a system that automatically plates the finished, approved dish and gets it ready to serve.
How Often Should My Team Be Committing Code?
The golden rule here is integrate early and often. You want developers committing small, focused changes several times a day.
Each commit should be a complete, logical piece of work that doesn’t break anything. Pushing small updates frequently makes it incredibly simple to find the exact source of a problem when a test inevitably fails. No more hunting through a week’s worth of code to find one bad line.
Do We Really Need 100% Test Coverage for CI?
Not at all. While it sounds like a great goal, chasing 100% test coverage can be a trap, often leading to wasted effort on tests that don’t add much value. The real aim is to have a smart, effective test suite that gives you genuine confidence in your code.
Instead of fixating on a number, focus your energy on what matters most:
- Covering your critical user journeys.
- Testing the core business logic of your application.
- Writing solid tests for every new feature and bug fix.
A suite of meaningful tests is always better than hitting a vanity metric with a bunch of trivial ones.
Ready to gain visibility into your team’s AI-assisted workflows? Zest provides AI Standups and metrics to help you measure and improve your coding process. See what your team can achieve at https://meetzest.com.